Friday, September 28, 2012

At Home with Rebecka is moving to Word Press - Please stop by my new site and follow


Italian Escarole Soup with homemade orecchiete


Dear At Home with Rebecka Followers,

I'm moving to Wordpress!

I've been toying with the idea of moving my blog to Wordpress for about a year.  I have finally taken the plunge and I'm now the proud owner of www.athomewithrebecka.com.   Please take a moment to visit my new site and follow me via RSS feed or email.  You can also follow me via all my social networks, Pinterest, Linkedin, Facebook, Google+, LinkyFollowers and Twitter.
In a few short days, all Blogger visits will be re-routed to my new site.

Your faithfulness and your continued support is priceless! Thanks you!!

I've created a delicious and heart warming soup to commemorate my first Wordpress post, Italian Escarole Soup with homemade Orecchiette Print Friendly and PDF

Tuesday, September 11, 2012

Canning Fig Preserves


 Canning Fig Preserves


Figs, plump and naturally sweet are one of my favorite fruits to preserve.  I used Totato, Mission and Turkish figs this year and found the combination delivered a superbly flavored preserve with a round velvety texture.  I opted to forgo the pectin since figs are loaded with it naturally. 

Pectin is used in canning jams, jelly's and preserves and acts as a thickening agent.  Mainly extracted from citrus fruits then reduced into powder form.  It can also be purchased in a condensed liquid form and used for canning in the same manner as powder pectin.  I used less water in the recipe and reduced the mixture down by almost half, so there was no need to add pectin.


I've also been reading up on food photography and investing in a few items to help control the light, while reading my camera's owners manual to get the best possible settings for the shot. I've found that I need a better lens to capture a crisper/sharper image, up close or in macro setting.  I'll be saving my pennies while I begin my search for a higher quality camera and lens. In the meantime, I'll be doing my best to take a higher quality photo with the camera I'm currently using.


Fig Preserves Recipe 
Makes 5-6, 8 ounce jars
prep time 35-40 minutes

 
8 cups whole fresh figs
2 teaspoon baking soda
2 1/4 cups granulated sugar
1 teaspoon minced ginger
zest from 1 lemon
3 tablespoons fresh squeezed lemon juice
3 cups hot tap water

Method 

  • Dissolve the baking soda in about 2 quarts hot tap water, and immerse the figs in the treated water in a large bowl. Gently stir to wash the figs, then drain off the water and rinse the figs thoroughly with fresh cool water.  
  • Slice figs in half, if you prefer a whole fruit preserve, skip this step
  • In a large stock or canning pot, combine figs, sugar, lemon juice, lemon zest, ginger and 1 cup hot tap water
  • bring to a boil stirring frequently, if using whole fruit gently stir in order no to break fruit
  • reduce heat and continue cooking until mixture is thick and gooey.  Watch closely in the last few minutes to keep bottom from burning
  • fill sterilized jars with hot preserves leaving 1/4 inch head space and cover with clean tops and rims
  • cook in a hot water bath for 15 minutes.  
  • Follow links for detailed canning instruction.
Open jars can be kept up to 3-4 weeks in the refrigerator.  Spread a generous helping of fig preserves onto a crusty French bread and savor the flavor!


Print Friendly and PDF

Tuesday, September 4, 2012

Homemade Roasted Garlic Mayonnaise


If you haven't already tried making homemade mayonnaise, today is the day to get out the egg yolks, lemon juice, garlic and olive oil to whip up a batch.  It's just that simple.  Throw in a pinch of salt and pepper and you've taken your every day mayonnaise to spectacular heights.  

The flavor is beyond any store bought version and the health benefits of making your own out shine the store bought version by a mile.   Packed with protein, minus the preservatives as well as the health benefits of using olive  oil, this is a must try recipe.

Emulsion Facts: Mayonnaise is classified as an emulsion.  An emulsion is made up of two or more liquids that when blended together slowly become a stable cohesion.   Culinary emulsion can take two different forms; fat dispersed into water and water dispersed into fat. Common fat in water emulsifications include hollandaise, mayonnaise, aioli, milk, cream, and pan sauces. Water in fat emulsifications are most commonly found in the form of vinaigrettes and whole butter.  

Amazing Eggs Facts: Egg yolks have a natural molecule called lecithin and when added to lemon juice and olive oil, the lecithin acts as a stabilizer. Without the addition of the egg yolk, the oil and lemon juice are unable to create an emulsion and will eventually separate.

Let me be clear, I'm not claiming to understand emulsions in a scientific manner, or profess to be an expert in the area, all I know is that when you mix egg yolks, oil and lemon juice, you get a delicious, creamy condiment called mayonnaise.  


Safety Issues: The recipe calls for raw egg yolks which can carry the risk of salmonella, so it's vital you purchase the freshest eggs possible.   Food science experts say that citrus juices and olive oil kill bacteria but you can elevate any worry by using pasteurized eggs. 

Pasteurization: is the process of heating food to a specific temperature for a certain duration and immediately cooling.  Pasteurization slows the process of microbial growth which in turn slows spoilage.   

Safe Storage: To store homemade mayonnaise safely; keep any unused portion in an air tight container and keep refrigerated up to 42 hours

Personal Note: I've never had a "bad" batch of homemade mayonnaise in all the years I've been cooking.

Other considerations: I use a pure olive oil or a mixture of safflower, and corn oils to insure the mayonnaise will not break after being refrigerated.  Extra virgin olive oil has a tendency to break after refrigeration.  

Fixing a Broken Emulsion: If your mayonnaise breaks after being refrigerated it doesn't mean you have to throw it out.  Just beat a room temperature egg yolk in a medium bowl and slowly whisk in the leftover mayonnaise.


Roasted garlic imparts a nutty flavor to the rich and creamy texture of this homemade condiment.  Other options for flavored mayonnaise; add a pinch if chili powder, chopped green chilies, fresh herbs such as basil or tarragon; the sky is the limit when making your own mayonnaise. 

Homemade Roasted Garlic Mayonnaise
makes about 1 1/2 - 2 cups
preparation 15 minutes

Recipe
 
2 raw egg yolks
3/4 cup pure olive oil
2-3 tablespoons fresh lemon juice
pinch of salt and white pepper
1 whole head garlic
2 tablespoons olive oil 

Method

Preheat oven 350 degrees
  • slice through the top off the garlic bulb as shown in the photo above.  Place the bulb on a square piece of aluminum foil, drizzle with 2 tablespoons olive oil.

 
  • Wrap foil around bulb, twist top closed and bake at 350 degrees for 45-50 minutes.  If roasting just one garlic bulb use a toaster oven  to save energy.
Mayonnaise
  • using a blender or hand held blender wand, mix egg yolks, lemon juice, a pinch of salt and pepper for a few seconds
  • with mixer running on medium speed, slowly drizzle a thin stream of olive oil into egg yolks
  • mayonnaise will begin to thicken after about 1/4 cup oil is added, at that point adding a faster stream of oil is fine and will make the process go faster
  • continue to add oil until mixture is thick, it's possible that not all of the olive oil will be used to complete your mayonnaise, you may also add more lemon juice to thin the recipe if it becomes too thick
  • remove roasted garlic from oven and allow to cool slightly 
  • hold garlic bulb by the back end and squeeze the roasted flesh into a small bowl, you may need to use a paper towel to hold the bulb if it is still to warm to handle
  • add garlic to mayonnaise and blend until incorporated
  • taste for seasoning

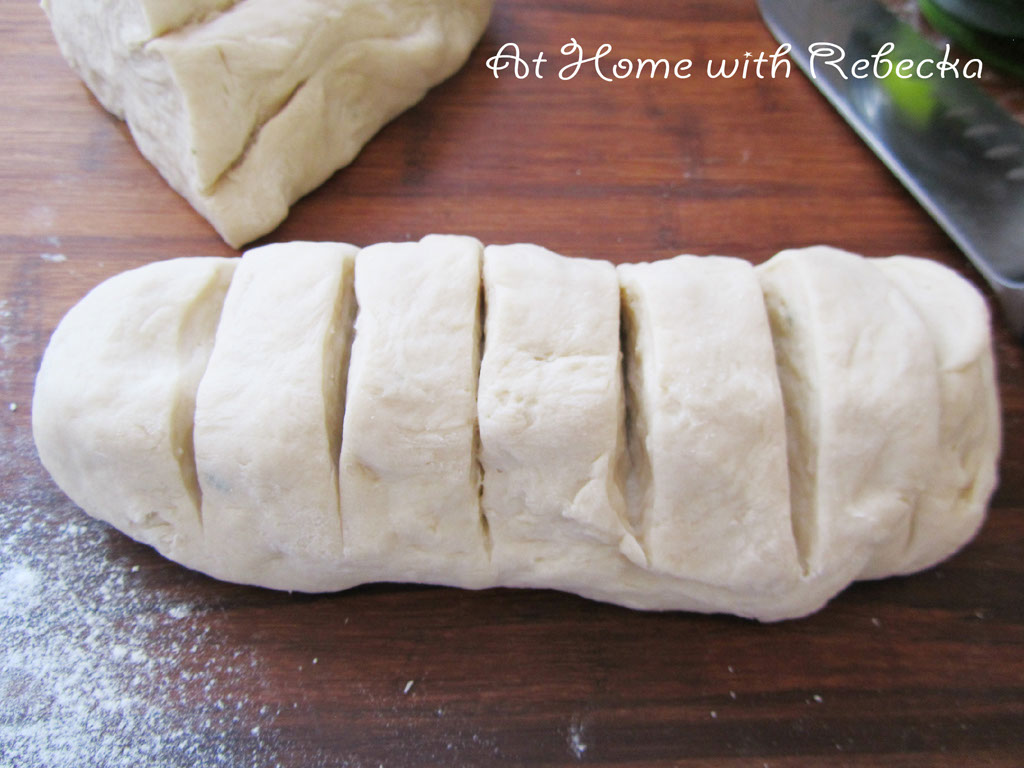
Roasted Garlic Mayonnaise is the essential flavor component in my Veggie Sandwich, made with Homemade Sandwich Rolls
 
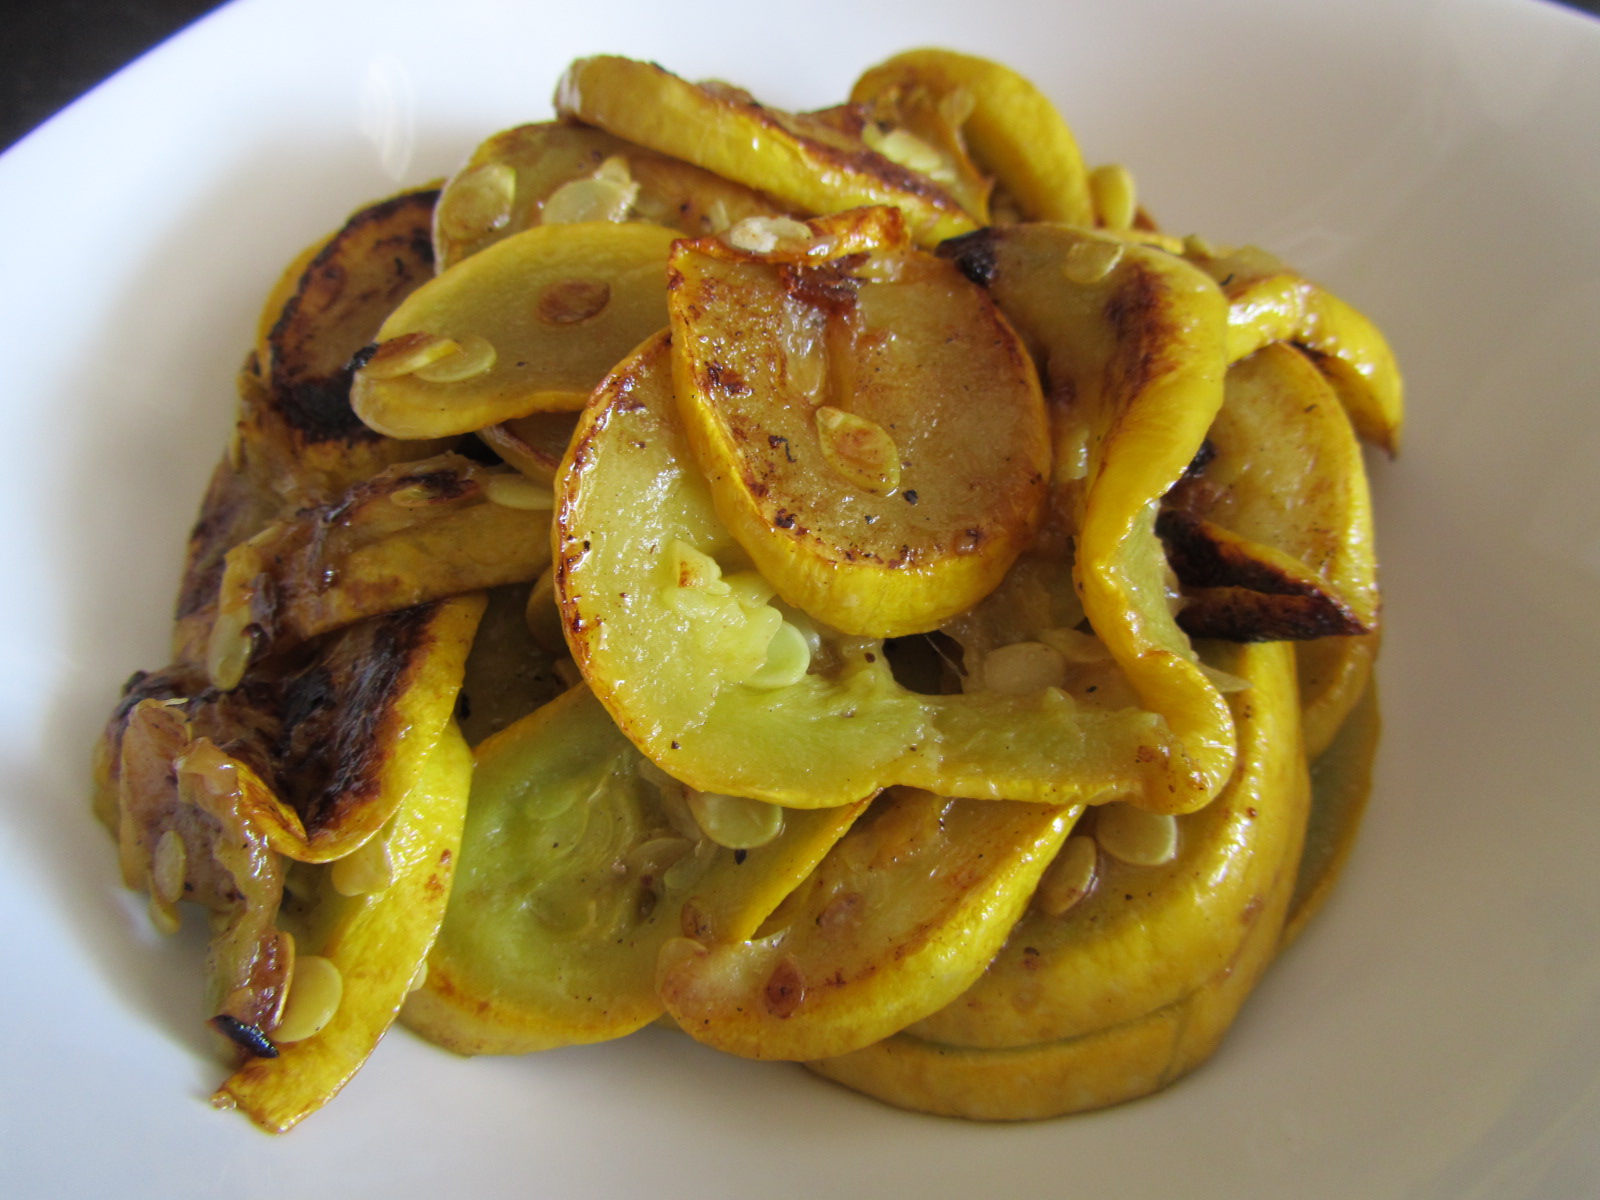
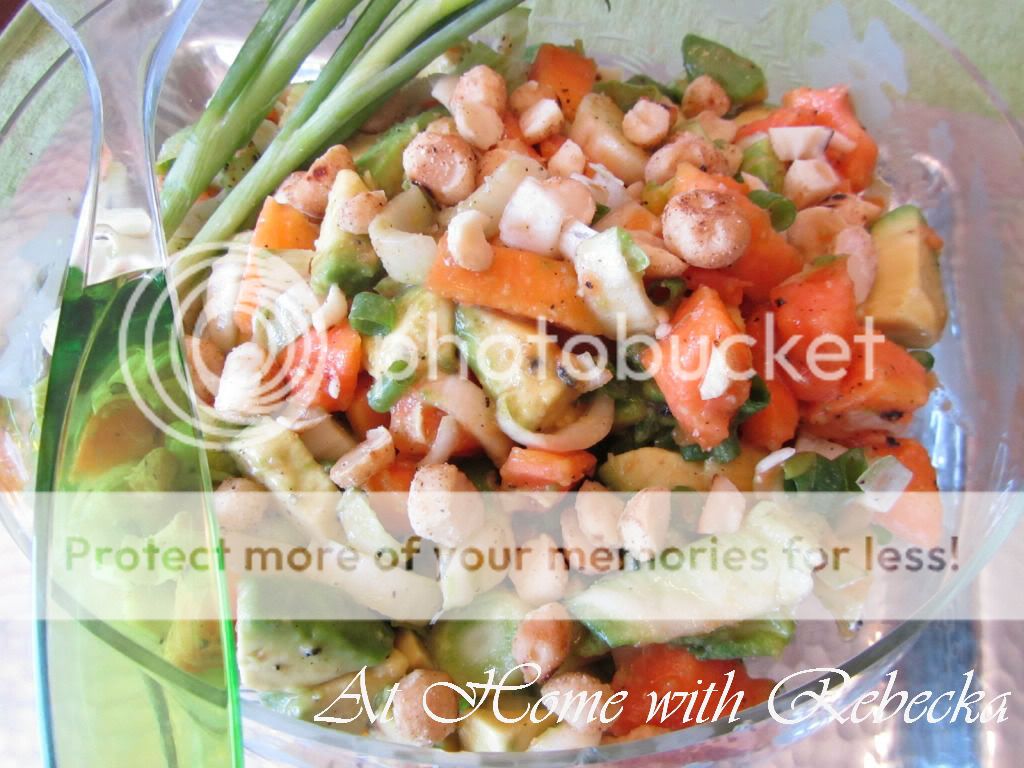
Thinly slice fresh squash, zucchini, sweet or red onion, cucumber, tomato, avocado, lettuce and a handful of spicy sprouts. Enjoy!


Print Friendly and PDF

Friday, August 31, 2012

Homemade Sandwich Rolls


When I was a young mom my days were filled with raising five children under the age of thirteen. My children have brought me great joy over the years and along the way, many moments of hair pulling and consternation.

As a way to release the pressures of young motherhood, once or twice a year I would make plans to visit the local spa for a few hours of respite. 


Raising a large family always meant that I was operating within a budget so to get the spa experience that made the most of my funds, I generally opted for a spa pedicure. There is nothing more relaxing for me than to have my feet rubbed.

I frequented the same spa knowing they offered a delicious yet inexpensive lunch to round out my day of relaxation. I'm sure it's no surprise that my favorite moments always come back to the food!

Arriving fifteen minutes early allowed me enough time to slip into a comfy robe, fluffy slippers and sit quietly in the waiting area listening to the sounds of the water feature and calming music. 


As I sipped on a cold glass of cucumber water my technician sat quietly beside me with a small tray of infused oils. After a sniff of each oil I choose the fragrance that most suites my mood for the services provided that day.

By the time I reach the pedicure room, my mind begins to move from thoughts of domestic everyday life to the place of tranquility that I so desperately need.

My feet find comfort in a tub of hot bubbling water, spewing the aromas of eucalyptus and sandalwood, filling my nostrils with their scents. Off I float into peaceful bliss.

Sadly, the worst moment of a pedicure is when the technician pulls her hands away from your lower limbs and whispers, "all done". The end of a pedicure leaves me wanting more but I know that lunch from the neighboring French bakery is on its way. Reluctantly, I pull myself from the humming,
heated chair to the outer room, and find my way to a small table. The table is set with light linens, a small bouquet of fresh flowers, and a glass of fruity white wine. I settle back into an over sized rattan chair as my lunch arrives.

Fresh made rosemary sandwich bread sits atop a white china plate, the bun slathered with homemade mayonnaise and piled high with thinly cut fresh veggies. Accompanied by a small mixed green salad dressed in a light lemon dressing, my eyes take in the cleaver plating while my mouth prepares to sup!

The bread is tender and flavorful balanced by the crisp vegetables. The creamy mayonnaise is the glue that holds it all together creating the perfect bite!

Allow me to share my recreation of the French Bakery's Rosemary Sandwich Rolls.

Homemade Rosemary Sandwich Rolls

Recipe 

1 cup milk
1/2 cup water
1 tablespoon granulated sugar
1/4 cup butter
4 1/4 cup pre sifted flour
1 package Rapid Rise yeast
1 1/2 teaspoons sea salt
1 tablespoon fresh chopped fresh rosemary

1 teaspoon sea salt
1 egg yolk beaten

Method

  • in a heavy bottom saucepan heat milk, butter, water, 2 teaspoons chopped fresh rosemary and sugar until butter is melted.
  • using a cooking thermometer, cool until mixture reaches 120 degrees Fahrenheit.
  • in a separate mixing bowl blend 2 cups flour with yeast, 1 1/2 teaspoons sea salt
  • pour milk mixture into the bowl of a stand mixer, add flour mixture
  • blend using the paddle attachment on medium low until mixture comes together
  • gradually add remaining flour 1/2 cup at a time, beating well between each addition until dough forms a ball
  • remove dough to a lightly floured surface and knead for 5 minutes or until dough becomes smooth and elastic, add more flour if the dough is too sticky
  • roll dough into log shape (see photo)
  • separate dough into two equal portions
  • using a sharp knife cut 1 1/2 inch pieces (a kitchen scale may be used to measure exact size)
  • shape rolls into balls
  • place rolls on a baking sheet or pizza stone about 1/2 inch apart and press tops down slightly
  • cover with plastic wrap or clean dry towel and let rise until double in size
  • Preheat oven to 400 degrees Fahrenheit
  • beat egg yolk and brush evenly over risen rolls, sprinkle each roll with remaining rosemary and teaspoon sea salt
  • bake rolls for 10-12 minutes


I hope you enjoy this recipe as much as I do. They the flavor and texture is quite like the French Bakery version.  
I use the rolls for burgers as well as vegetable and meat sandwiches. optional: sprinkle with sesame seeds for a delicious hamburger bun


Print Friendly and PDF

Tuesday, August 28, 2012

Melynda Fleury, Book Fair Giveaway during the week of Labor Day


In honor of Melynda Fleury's close call to losing her eyesight because of diabetes, Wayman Publishing is throwing a Blogfest and Book Fair Giveaway during the week of Labor Day.

1.)  ALL ENTRANTS will have unlimited access to download any of Wayman Publishing's Top 10 Books during the following dates:  Sept 2 through Sept 4 (direct link will be provided to all entrants on Sept 1st). 

2.)  In addition, Mommy Blog Designs, the blog designer with an AWESOME reputation for her service and blog designs throughout the blogosphere, has also agreed to contribute one of her Premade Designs with full package ($269 Value) for FREE to one lucky winner!

3.)  PLUS, one winner will recieve $200 paypal cash!

Each person will be given a chance to enter as many points as they wish. But remember, the more entry points you gain, the higher your likelihood is of winning. Only 10 minutes of your time will get you closer to winning a really awesome prize!


The actual dates of the giveaway will be: 8/28 - 9/5.

Wayman Publishing and our other hosts who've helped organize this giveaway (voiceBoks, Linkie's Contest Linkies, Mommy Blog Designs, and Terri's Little Haven) thanks you for all your help and participation!


a Rafflecopter giveaway


Print Friendly and PDF

Monday, August 27, 2012

Summer Blooms and Bees


I haven't had the opportunity to share any wildlife or Flora and Fauna photos with my readers lately so I decided to snap a few shots and share them with you today.  Hope you enjoy!


Print Friendly and PDF

Thursday, August 16, 2012

Citrus Mint Sherbet - no ice cream maker necessary and my 204th blog post


I can't believe I totally missed my 200th blog post.  After checking my post count today, I'm at 203 and counting.  I'd say that 203 blog posts is a big milestone for me given the fact this "blog thing", was just a whim when I started.  What began as a fanciful hobby became a true passion and labor of love.   I suppose this 204th blog post is as good as any to celebrate the continuing chronicle of my life in food.

Citrus Mint Sherbet -no ice cream maker necessary


Temperatures are still topping out in the nineties here in Colorado so I'm choosing to take advantage of the weather and capture the last vestiges of summer with my sweet and creamy Citrus Mint Sherbet!

Tangy and refreshing, my sherbet recipe has just a hint of dairy.  Only a 1/4 cup of heavy cream is added to create a velvety texture without losing all the crisp refreshing flavors.  In addition, the mixture of the three different citrus juices give the recipe an unusually rich and smooth flavor. 

One of the citrus juices I used for the recipe is the delightful grapefruit flavored Yuzu juice.  Originating in East Asia, Yuzu is tart and has a hint of Mandarin orange flavor.  Check out the two links above to see two more of my recipes utilizing Yuzu juice and it's cousins  Sudachi and Kabosu juices.


I've chosen the freezer method for this recipe for those of us who don't have an electric or hand crank ice cream maker at our disposal.  Unfortunately, my previous hand crank ice cream maker finally broke down after years of loyal service.  I've found that preparing the recipe in the freezer doesn't change the flavor or deplete the consistency of the sherbet, it just takes a lot longer to prepare.  

Optional: This recipe can be adjusted by omitting the heavy cream turning it into a delightful sorbet. 

Recipe

1 1/2 cups water
1 1/2 cups granulated sugar
1/2 cup Yuzu juice
1/2 cup lime juice
1/2 cup lemon juice
1 cup loosely packed fresh mint leaves
1/4 cup heavy whipping cream (optional: buttermilk)
zest from one lemon


Method
  • in a medium heavy bottom sauce pan blend water, sugar, citrus juices and fresh mint leaves, stir to combine
  • bring to a boil
  • remove from heat and steep mixture for 10 minutes
  • strain mixture into a non conductive metal bowl or pan, shallow bowls will freeze much faster
  • add lemon zest and whipping cream and whisk to combine
  • place in freezer for 6-12 hours
  • every two hours or so, stir the mixture to bring all the frozen particles into the mixture for more even texture
The sherbet melts quickly so I generally freeze my serving bowls or glasses prior to serving my guests.


Print Friendly and PDF

Wednesday, August 15, 2012

Picnic Pork Roast


Pork Shoulder or Picnic Roast is cut from the upper portion of the pigs shoulder and one of my favorite parts of the pig!  The flavor is mild and very tender with a good layer of fat that turns into crunchy pork goodness after a long day of slow cooking.

Recipe

1-10 pound picnic pork roast
1/2 cup yellow mustard
1/2 teaspoon salt
1/2 teaspoon fresh ground black pepper
1/2 teaspoon Lawry's garlic salt
1/2 cup wine white or red
1/2 cup water
6 sprigs fresh thyme

  • rinse pork with cold water and pat dry
  • place in a large roasting pan
  • make a paste with mustard, salt, pepper and garlic salt
  • rub roast with paste, messaging the paste into the skin
  • cover and cook at 350 degrees for 4 hours, reduce heat to 300 and cook additional 2-4 hours. 
  • Note:  be sure to add more water if the bottom of the pan becomes dry
The roast will done after about 5 hours but the continued cooking time only makes the roast more tender and reduces the fat to a crisp layer. 

Enjoy this fall off the bone roast with baked or mashed potatoes and don't forget to make some pan gravy from the drippings. 

A big roast like this never goes to waste in my kitchen.  I'll make a delicious pork green chili with what's leftover.  YUM!


Print Friendly and PDF

Saturday, August 11, 2012

Salt and Sugar Body Scrub!


This summer has taken a toll on my ever aging skin leading me in hot pursuit of body butters, skin toners, deep moisturizers and rendering me poorer with every purchase.  It's so disappointing to purchase an over priced product and find myself pushing it under the sink with the rest of the partially used bottles and tubes of less than stellar lotions and creams.

I've always known that eating the right foods aids in not only our inner health but our outward appearance as well.  This luscious home made remedy has bathed my dry chapped skin at a fraction of the cost!  My skin feels well fed and has taken on a supple glow. 

All of the ingredients were easily found in my pantry and it took only minutes to whip up a batch. 

Recipe

2 cups granulated sugar
2 cups sea salt
2 cups grape seed oil
4 lemons
5 sprigs fresh rosemary

Method
  • Blend salt, sugar and oil together in a large mason jar or other resealable container.
  • Slice lemons in half, add juice to mixture as well as the sprigs of rosemary, stir to combine.
  • Reserve the spent lemon halves to use as your exfoliating tool
  • Stand in tub or shower and fill one half of spent lemon with mixture, begin scrubbing skin from head to toe, add more scrub when necessary
  • turn water on to a comfortable temperature and rinse body thoroughly, pat skin dry with a towel
  • repeat treatment twice to three times a week
  • optional: use grape seed oil as moisturizer in between treatments to keep skin supple
My skin was glowing after my first treatment and increasingly healthier with each subsequent application. 


Print Friendly and PDF

Melynda's Labor Day Blogfest & Book Fair - FREE Blogger Opportunity

Melynda's Labor Day Blogfest & Book Fair - FREE Blogger Opportunity
My friends at voiceBoks - The Voice of Parenthood are hosting this awesome blog builder and giveaway.  Please take a moment to join our community and build your blog traffic, earn free links, and cash prizes while aiding a fellow blogger in the fight against diabetes.

If you haven't already heard...
Wayman Publishing is honoring a dear friend of theirs who's fought against diabetes by offering an awesome giveaway together with voiceBoks, Mommy Blog Designs, Linkie's Contest Linkies, and Terri's Little Haven.

For all the details, please visit Melynda's Labor Day Blogfest & Book Fair - Blogger Opportunity.

For those who aren't familiar with how this works... you sign up for the giveaway, promise to promote it, and in return we enter your links as part of the entries so that those entering the giveaway can follow your networks. Please sign up as soon as possible as it usually gets busy immediately! Remember, whoever enters first gets their link up at the very top!


Wayman Publishing reaches out to so many people. This September, they are honoring Melynda Fleury for her brave fight against diabetes by offering a 3 part giveaway to get everyone involved in reading and this giveaway! What are we giving away?

1) Unlimited free downloads of their TOP TEN Bestselling Books to all entrants of this giveaway.

2)
Mommy Blog Designs, YES! Many of you know this woman already because she has an AWESOME reputation for her service and blog designs throughout the blogosphere, has also agreed to contribute one of her Premade Designs with full package ($269 Value) for FREE to one lucky winner!

3) We are also offering a CASH POT PRIZE! Wayman Publishing is also contributing $100 towards whatever our pot prize is for the giveaway. So, yes, we begin at $100!


How to participate:
Everyone who enters and agrees to participate as a blogger in this giveaway will be able to enter one link free (no Google+ please). If you refer a friend, you can enter two links free (no Google+ please).

You can enter more than one link, but each social link will be $3 and $5 for each Email/RSS subscriptions.

1) Please fill out this form

2) Please send any payments through Paypal to:
amokbus@hotmail.com

3) Grab the button link above and post it on your site

4) Tweet about this giveaway:


Please schedule August 26th on your calendar to make it the last day to post about the giveaway. You will receive info to be posted on your site on August 24th.


Giveaway's Actual Date:

The actual dates of the giveaway will be: 8/28 - 9/5.

Wayman Publishing and our other hosts who've helped organize this giveaway (
voiceBoks, Linkie's Contest Linkies, Mommy Blog Designs, and Terri's Little Haven) thanks you for all your help and participation!
Print Friendly and PDF

Friday, August 10, 2012

Frozen Yogurt Disks


I recently saw a beautiful photo of  Frozen Yogurt Disks on Pinterest. I immediately thought to myself, "what a great idea"!

Easy to prepare as a healthy snack and the perfect finger food for our grand daughter's tiny hands.  Filled with loads of protein and live cultures to aid digestion, Amber loved them!  She spent thirty minutes marching back and forth to the freezer to gather another handful until they were gone. 


Amber Bug!!


Recipe

2-3 small containers of your favorite flavor yogurt


Method

  • spoon yogurt into a sandwich bag, cut a small hole into one end of bag and pipe small dots onto parchment lined cookie sheet (after preparing the dots, I found that the parchment is not necessary)
  • freeze for 1 hour, transfer to a zip top sandwich bag and store in the freezer


ENJOY!

Print Friendly and PDF

Thursday, August 9, 2012

Sauteed Red Tomatoes, Summer Squash and Poached Eggs


This time of the year my kitchen is overflowing with produce either locally grown, gathered from my back yard or  Palisades Colorado

Palisade is located on the Western Slope of Colorado and is known for the finest produce around. Palisade is also home to over 20 area wineries and the most succulent peaches I've ever tasted.  Sweet and juicy, they are always gobbled up before I can make a cobbler,  pie or my famous Peach Salsa.


Putting my produce into action I often find myself creating the simplest of dishes, allowing the vegetables or fruit to shine all on their own. Not much fuss to cook but filled with luscious flavor.

Fresh red tomatoes, summer squash and a soft poached egg bring me back to earth on those mornings nothing else will do. Add a cup of pipping hot coffee or espresso and I'm relaxed in no time, ready to take on the day. 

Recipe


Sauteed Red Tomatoes, Summer Squash and Poached Eggs

1 medium red or green firm tomato
2-3 summer squash
2 tablespoons butter
poached eggs
flour for dusting tomatoes
salt and pepper to taste

  • Using a heavy bottom skillet, melt 1 tablespoon butter on medium heat 
  • slice fresh red or green tomatoes cut about 1/4 thickness, dust with all purpose flour and sauteed in butter until browned
  • Remove from pan to a paper towel to drain any excess butter and season with salt and pepper. 
  • Note: Red tomatoes can get really mushy when cooked this way so try to find some that are fresh picked, nice and firm.  If I have the option, I use green tomatoes. 
  • slice squash and saute in remaining butter until brown, salt and pepper to taste

Serve with poached eggs, coffee or tea and enjoy the simple pleasure of this meal. 


Print Friendly and PDF

Tuesday, July 31, 2012

Fresh Cut Green Beans, Sauteed with Potatoes, Bacon and Onions


This recipes is one of my favorite summer fresh creations. Filled with flavorful memories of hot summer days in the garden with mom, the crisp cut green beans snap alongside the creamy texture of the sauteed potatoes and onions.  Bacon rounds out the dish with its savory smoke flavor.   

The simple flavors of summer express themselves in perfect harmony in this basic side dish!


Sharing the dish for lunch with my son, I prefer mine with a splash of red wine vinegar and a sprinkle of scallions. My son gobbled his share right from the pan.


Fresh Cut Green Beans, Sauteed with Potatoes, Bacon and Onions

Recipe
serves 4

1 pound fresh green beans
1 medium white onion
3-4 medium potatoes
1/4 pound bacon
2 tablespoons butter
red wine vinegar
2-3 scallions
salt and pepper to taste

Method

  • Cook bacon in a large cast iron skillet over medium heat until crisp, remove bacon and all but 1 tablespoon bacon fat
  • melt 1 tablespoon butter in pan
  • add potatoes and onions and cook covered, stirring frequently until potatoes are tender but not soft.
  • add cut green beans, remaining 1 tablespoon butter, cover and cook for 12-15 minutes, stirring occasionally
  • salt and pepper to taste
  • serve with red wine vinegar, garnish with chopped scallions


DELISH!!
Print Friendly and PDF

Thursday, July 26, 2012

Chicken Andouille and Shrimp Gumbo


I'd like to tell you that I'm a true Louisiana girl so that you'll trust the authenticity of my Gumbo recipe however, I'm pretty much made up of English and Welsh blood; raised in New Mexico and Colorado, without a single Cajun or Creole bone in my body!   I have many dear friends that are true blood Louisiana born, Cajun and Creole cooks, all of which I'm sure will be offended by my version of Chicken, Andouille and Shrimp Gumbo!  The thing is, I like Gumbo made my way! 

Gumbo is a rich diverse dish and every true blood Cajun and Creole cook will tell you theirs is the most authentic and best Gumbo in the world.  I'll admit, I've tasted some really outstanding Gumbo in my lifetime; each as different as the next.  Gumbo is a truly satisfying comfort meal to be sure.

The key to any Gumbo is the roux.  I prefer my roux cooked to a medium dark color instead of the deep amber brown of the traditional Louisiana dish.  I also add a can of original Rotel tomatoes to the mix!  I know, this is blasphemy to the hard core purist Cajun and Creole cook!  I can only ask that you give my version a try before you judge me to harshly!!  It's delicious.

My version of Chicken, Andouille and Shrimp Gumbo.

Recipe
Serves 8-10

1 cup flour
1 cup grapeseed oil
1 1/2 quart hot water
3 tablespoons chicken base
1 whole fryer chicken, rinsed, dried and giblets bag removed
1 pound Andouille sausage
1/2 pound fresh shrimp peeled and deveined
1 large white onion
1 large green pepper
4 large garlic cloves
4 stalks celery
4 bay leaves
1 tablespoon Creole seasoning
1 tablespoon file' powder (if you use okra omit the file')
1 8 ounce can original flavor Rotel tomatoes (substitute 3 ripe large tomatoes Rotel offends your sensibilities)
hot sauce to taste
salt and pepper to taste
Garnish: 1 bunch green onions

4 cups hot cooked long grain white rice (brown rice may be substituted)

Method

Roux
  • Heat grape seed oil in cast iron skillet on medium high heat
  • add flour and whisk together
  • Continue whisking for apporxamately 20 minutes or until the roux becomes medium brown to dark amber brown.
  • Watch roux carefully, it can go from dark browned to burned in nothing flat! 
  • add chopped vegetables to the roux when it becomes medium to dark brown
  • add 1/2 cup water and cook additional 5 minutes on medium high heat
  • vegetables can be cooked seperately and then added to the stock
Gumbo
  • transfer vegetable roux mixture to a large heavy bottom stock pot
  • add remaining water, spices, hot sauce and bring to a boil, reduce heat to medium
  • add whole chicken to pot and cover, cook chicken in broth for 2 hours or until fork tender
  • remove chicken to a large plate and cool for 5-10 minutes.  When chicken is cool enough to handle remove cooked meat and discard the bones and skin
  • chop chicken into pieces and sprinkle with Creole powder, set aside
  • using the cast iron skillet the roux was made in, cook sliced Andouille sausage until browned
  • add chicken and sausage back to stock pot
  • remove bay leaves
  • peel fresh shrimp, sprinkle with Creole powder, saute in drippings from sausage until pink, about 3 minutes
  • add shrimp to stock pot and cook additional 20 minutes to bring flavors together and reheat the chicken 
Pour gumbo over hot rice and garnish with chopped green onions.  Bon appetit

Print Friendly and PDF

Tuesday, July 24, 2012

Endive Avocado and Papaya-Summer Fresh Salad


Endive Avocado and Papaya-Summer Fresh Salad

I came across this recipe, years ago while hosting a Salad Brunch for the new ladies in our neighborhood. Each women was asked to bring a favorite salad while I provided a non alcoholic sparkling punch and mimosas as our liquid libations.   I served Lemon Bars for dessert, accompanied by coffee and a varieties of hot and cold teas to round out the meal.

As the years have past, I can't seem to remember all the details from the party. I do however, remember this particular salad and I'm pretty sure the woman who brought it was named Laurie. Unfortunately, I can't promise I have her name right!

I loved the flavor combinations of this delicious salad and I certainly wasn't willing to miss the opportunity to have recipe. I begged her for the recipe on the spot, writing feverishly what she remembered on a napkin. This fresh and tasty salad has graced many luncheon tables, holiday and family meals since that time.

I've altered the recipe somewhat but the flavors remain as I remember.  The creamy texture of the avocado is balanced perfectly by the sweet pungent flavor of the papaya. The peppery bite from the papaya seeds and crispness of the endive make every mouthful a delight. The salad is also complimented by the warm rich flavor of toasted macadamia nuts! 


Recipe Serves 4

1 ripe Hawaiian papaya or 2 Brazilian papaya (about 1 pound)
2 ripe Haas avocados
2 tablespoons chopped green onion, green part only
2 cups  sliced endive
1/2 cup toasted crushed macadamia nuts


Papaya Seed Dressing

2 tablespoons fresh papaya seeds
1/3 cup rice vinegar
2 tablespoons brown sugar
1/4 cup grape seed oil
1/4 teaspoon dry yellow mustard
1/4 teaspoon sea salt
3 tablespoons chopped Maui onion


Method
  • cut papaya in half and remove seeds, reserve 2 tablespoons seeds
  • in a food processor or blender, combine all dressing ingredients and papaya seeds, process on high until seeds resemble cracked black pepper
  • peel papaya and cut flesh into cubes.  Peel avocado and cut into cubes. Slice endive crosswise removing root end, discard end.  Chop green onions.
  • add 1/4 cup dressing and toss ingredients together in a large bowl.  Serve remaining dressing on the side
  • toast macadamia nuts for a few seconds in a dry heavy bottom skillet, watch closely so not to burn.  Place toasted nuts in a zip lock bag and lightly pound with a mallet until coarse.  Garnish salad with nuts, serve.
A few special notes about the recipe:

I've tried adjusting the amount of papaya seeds and find that using more than 2 tablespoons adds a bitter taste to the salad, less than 2 tablespoons and the delightful peppery flavors are lost.

Also, the delicate nature of the ingredients makes this dish one that needs prepared right before serving.  If you plan to take the recipe to an outing be sure to separate all the ingredients into plastic containers and toss together right before the meal.

ENJOY!

Print Friendly and PDF

Tuesday, July 17, 2012

Fried Green Tomatoes


This is my favorite version of fried green tomatoes. There are other recipes that call for eggs and making more of a batter and deep frying just too heavy for me.
 
Fried Green Tomatoes
 
4-6 green tomatoes sliced thick
1 cup flour
1/2 cup corn meal
1 teaspoon salt
1 teaspoon pepper
1 cup butter or vegetable oil

Method
Slice tomatoes thickly, in a medium bowl mix dry ingredients, flour both sides of a tomato and place in a hot skillet, repeat until your skillet is full but the tomatoes aren't to crowded.


Cook on first side for 3-5 minutes without turning, flip over and cook the other side 3-5 minutes. The idea is to creat a very brown crisp crust without loosing any of the flour mix. Season with salt and pepper taste.


Serve alone or as a side dish, YUM!!
Print Friendly and PDF

Thursday, July 12, 2012

Canning Pepper Jelly


I've decided to share a few of my favorite recipe posts from the At Home with Rebecka Recipe Vault, while I'm vacationing with family in Philadelphia, New York and Washington DC next week. 

To begin the week...Pepper Jelly. 

Pepper Jelly is not only a great Christmas gift but a delicious summer treat. I find it difficult to stop eating this addictive snack, and crave the sweet hot flavors with a creamy block of Philadelphia Cream Cheese.  I's that time of year so I think it's time to head out the the farmers market to buy a bunch of peppers!  Enjoy
 
Hot Pepper Jelly

When socializing during the Holidays or attending parties, and special events anytime of the year, I never arrive empty handed. Popular hostess gifts such as a nice bottle of wine or fresh cut flowers are a nice touch, but I try to take a different approach and make my gift a little more personal. I share a sweet jar of one of my homemade jellies, jams or chutney's

The bright red color of the crisp peppers is deliciously inviting, so I choose red, orange and yellow sweet peppers for my Pepper Jelly recipe.

Tasting the combination of sweet, hot pepper jelly on a crisp Water Cracker brings back memories of Christmas' long past and summer canning projects with my children.  Canning Pepper Jelly each year has become my signature Christmas gift for family and friends alike.

I also prefer my jelly very hot and add 3-4 habanero peppers to the hot pepper mix. It's easy to adjust the heat by using Jalapenos instead. I generally use two or three different varieties to bring a fuller flavor to the recipe.

Recipe
4 to 6 red or green sweet peppers
6 to 10 hot peppers habanero, jalapeno
6 cups sugar
1 1/3 cups white vinegar (5% acidity)
2 3-ounce packages liquid pectin
2-3 drops food red or green coloring (optional)

Method


  • Wash the peppers and remove seeds and ribs, and cut into chunks. Process each type of pepper in batches, in a food processor until coarsely ground.
  • Measure 1 cup ground sweet red pepper and 1/3 cup ground hot peppers.
  • Combine ground peppers, sugar, and vinegar in a large saucepan; bring to a boil.
  • Boil 6 minutes stirring frequently.
  • Stir in pectin and boil 3 minutes, stir frequently.
  • Remove from heat and skim off foam.
  • Pour hot jelly into hot sterilized jars, leaving ¼ inch. Wipe jar rims with clean damp cloth. Cover with metal lids and screw on bands; Process in water bath for 5-10 minutes. Makes 6 half pints.
My recipe has been adapted throughout the years but it's origins are founded in the Household Search Light Recipe Book and Fannie Flagg's Whistle Stop Cafe Cookbook.

Pictured: Recipe Extra Hot Habanero Pepper Jelly
Click photo for recipe


You might also like to read Mount Vesuvius Erupts in my kitchen .  A tale of canning gone wrong, with a happy ending!

  Print Friendly and PDF

LinkWithin

Related Posts Plugin for WordPress, Blogger...
BlogWithIntegrity.com